Connect your AWS account and import your infrastructure
In this section we will explain step by step how to link your AWS account with Holori and import your infrastructure in the diagramming tool.
Step 1:Create a cross account on the AWS console
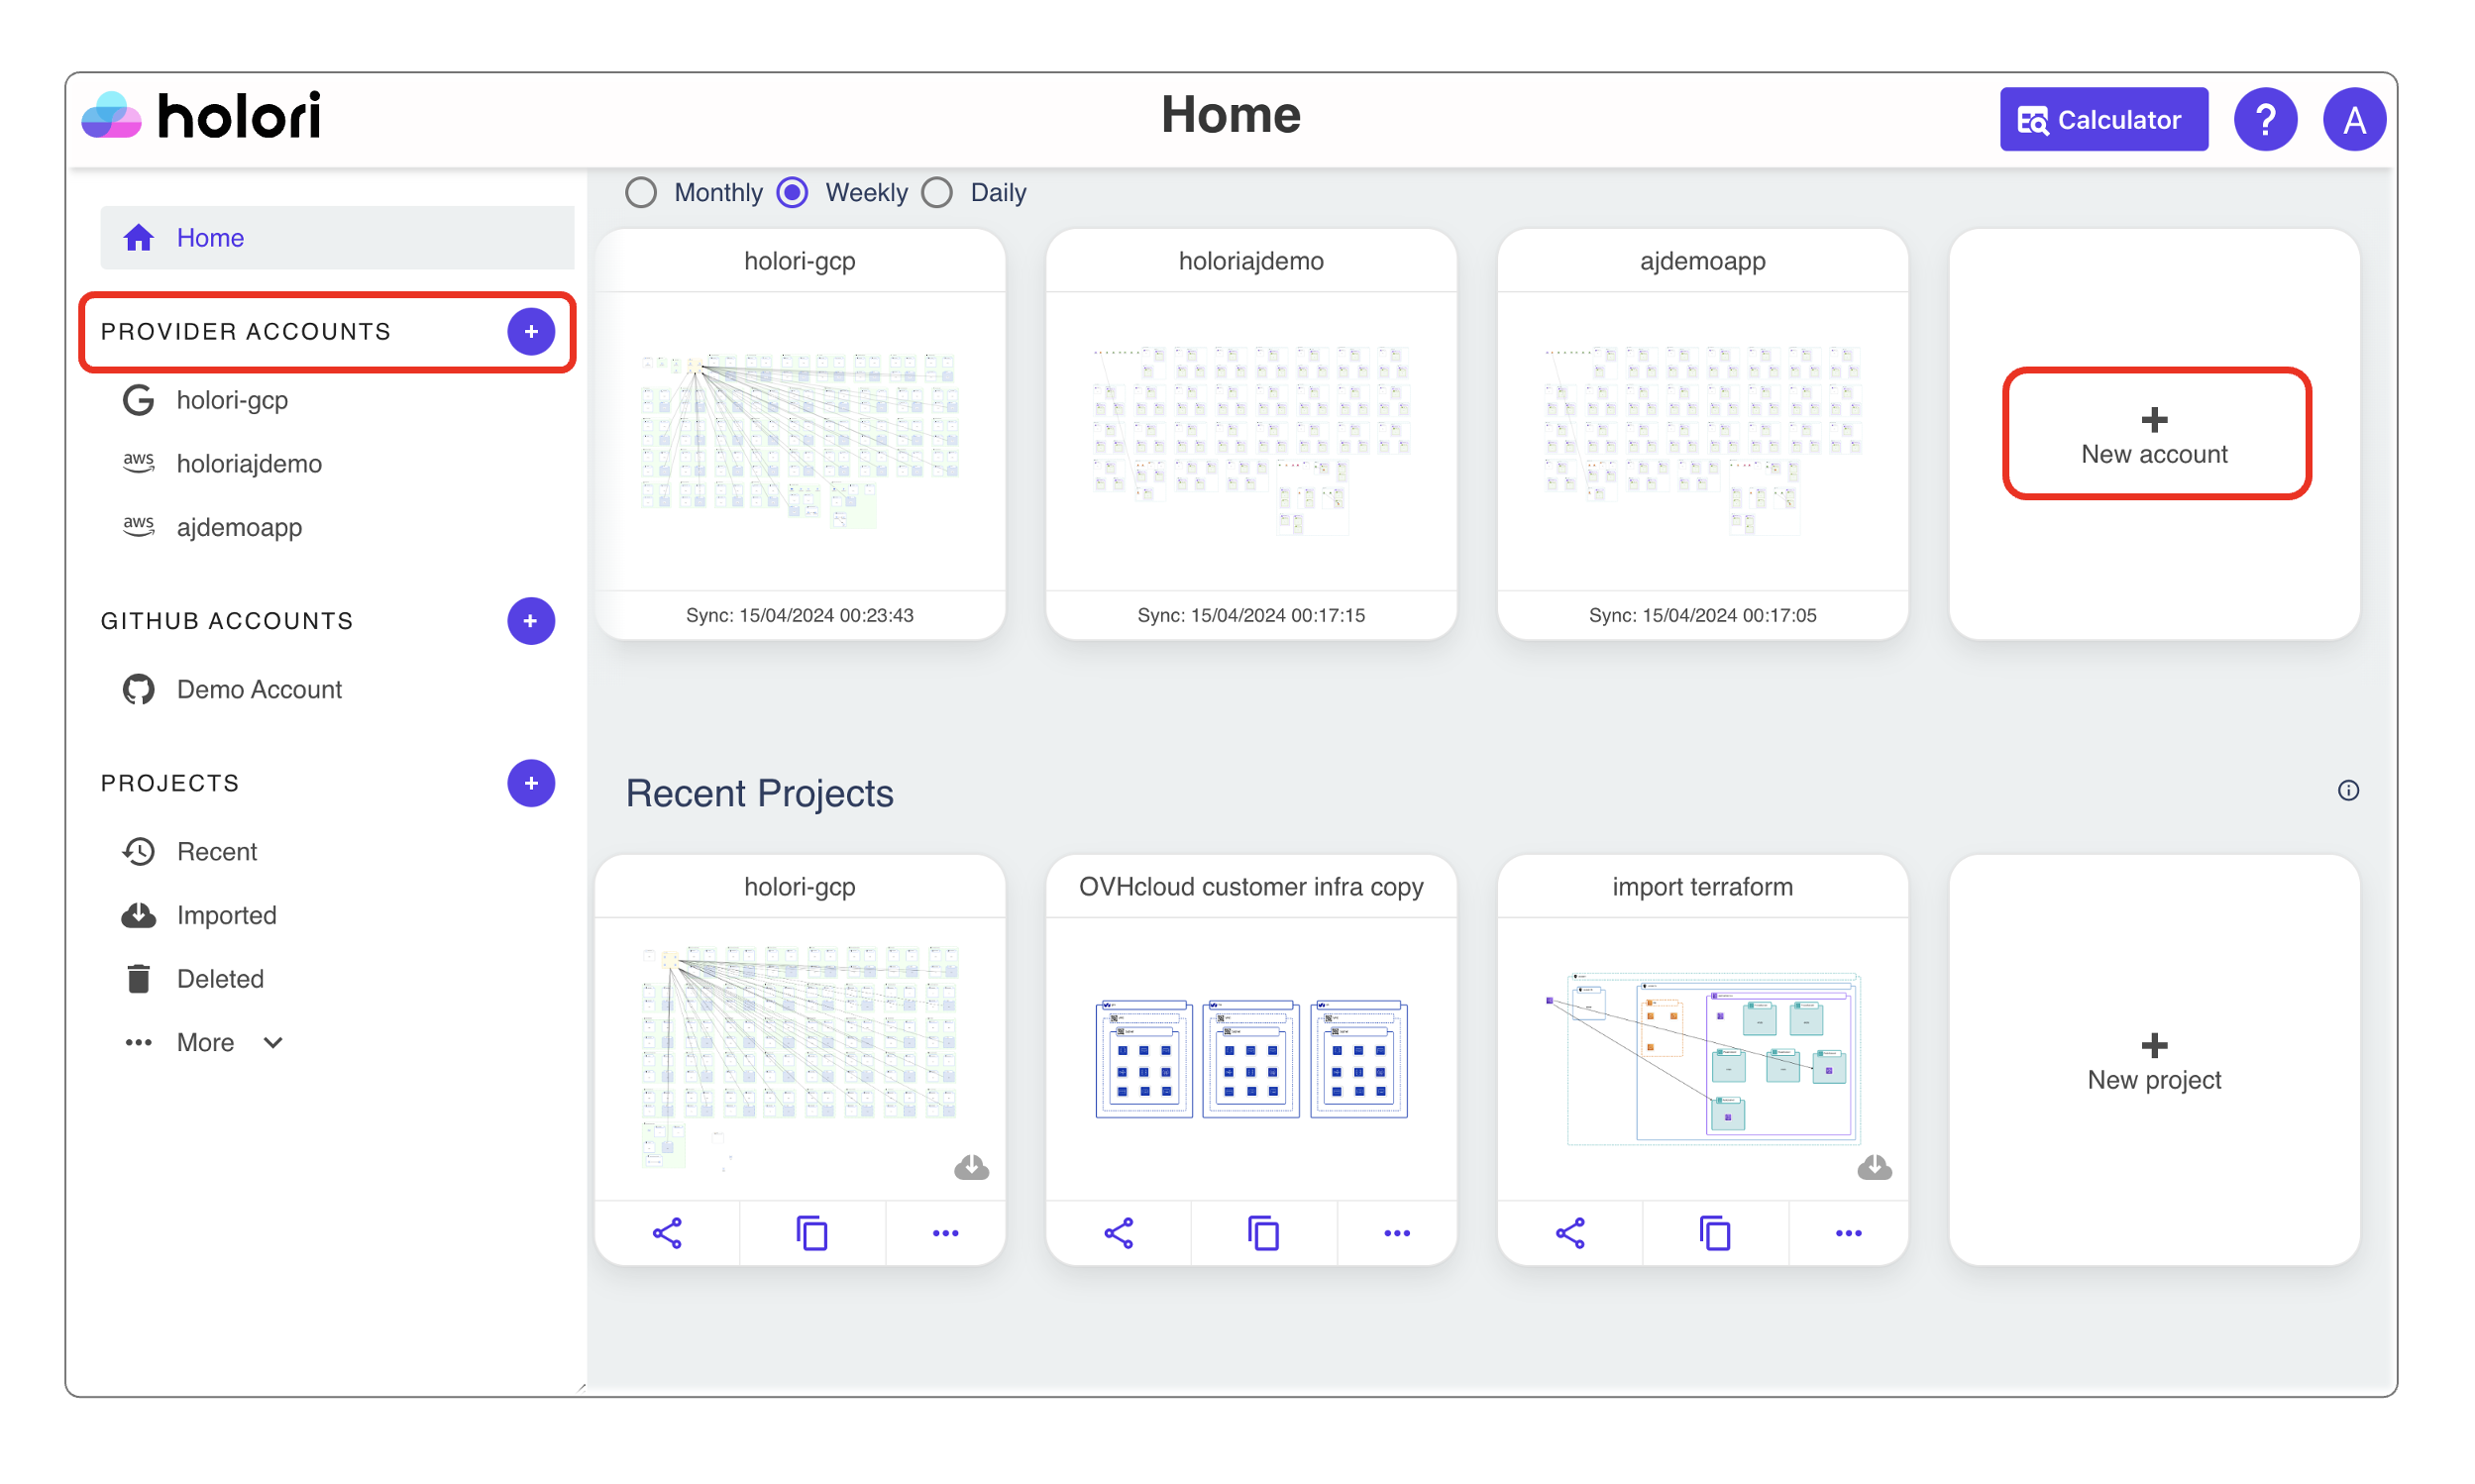
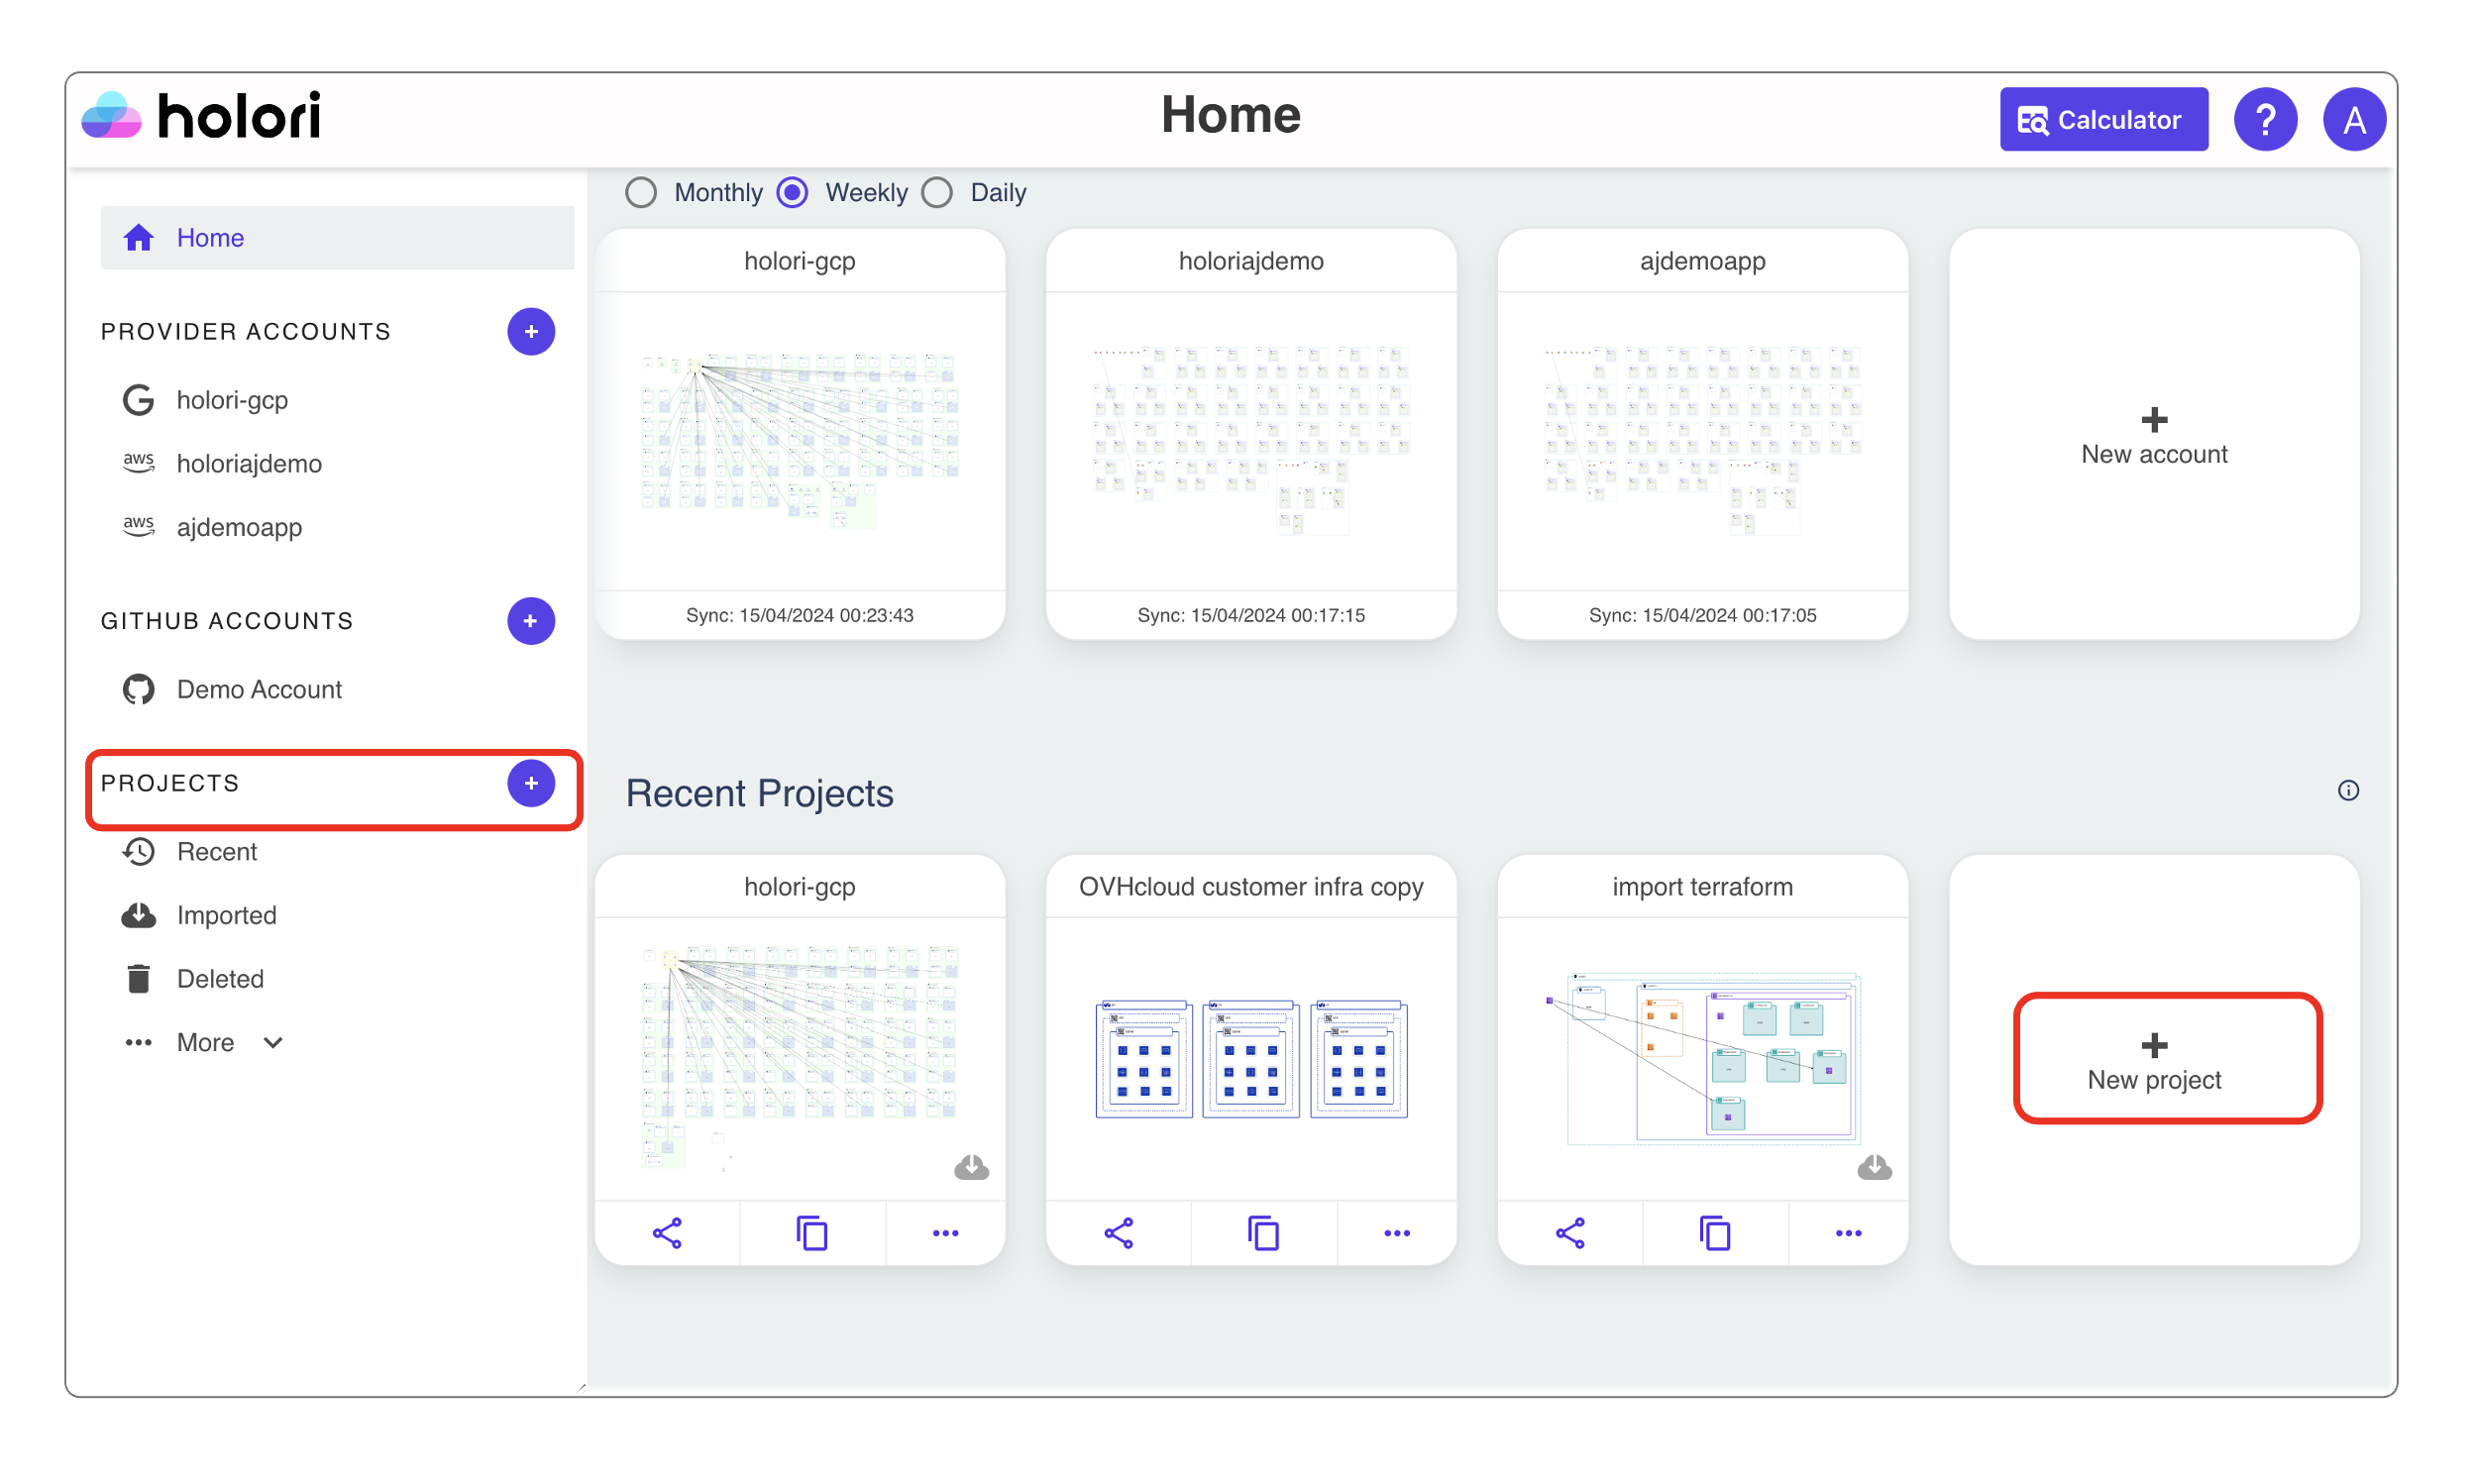
1- On the homepage, select "New account" in the center of the page under the "Sync account" category or click on the "+" sign next to "Providers accounts" on the left panel.
2- Then select "AWS".
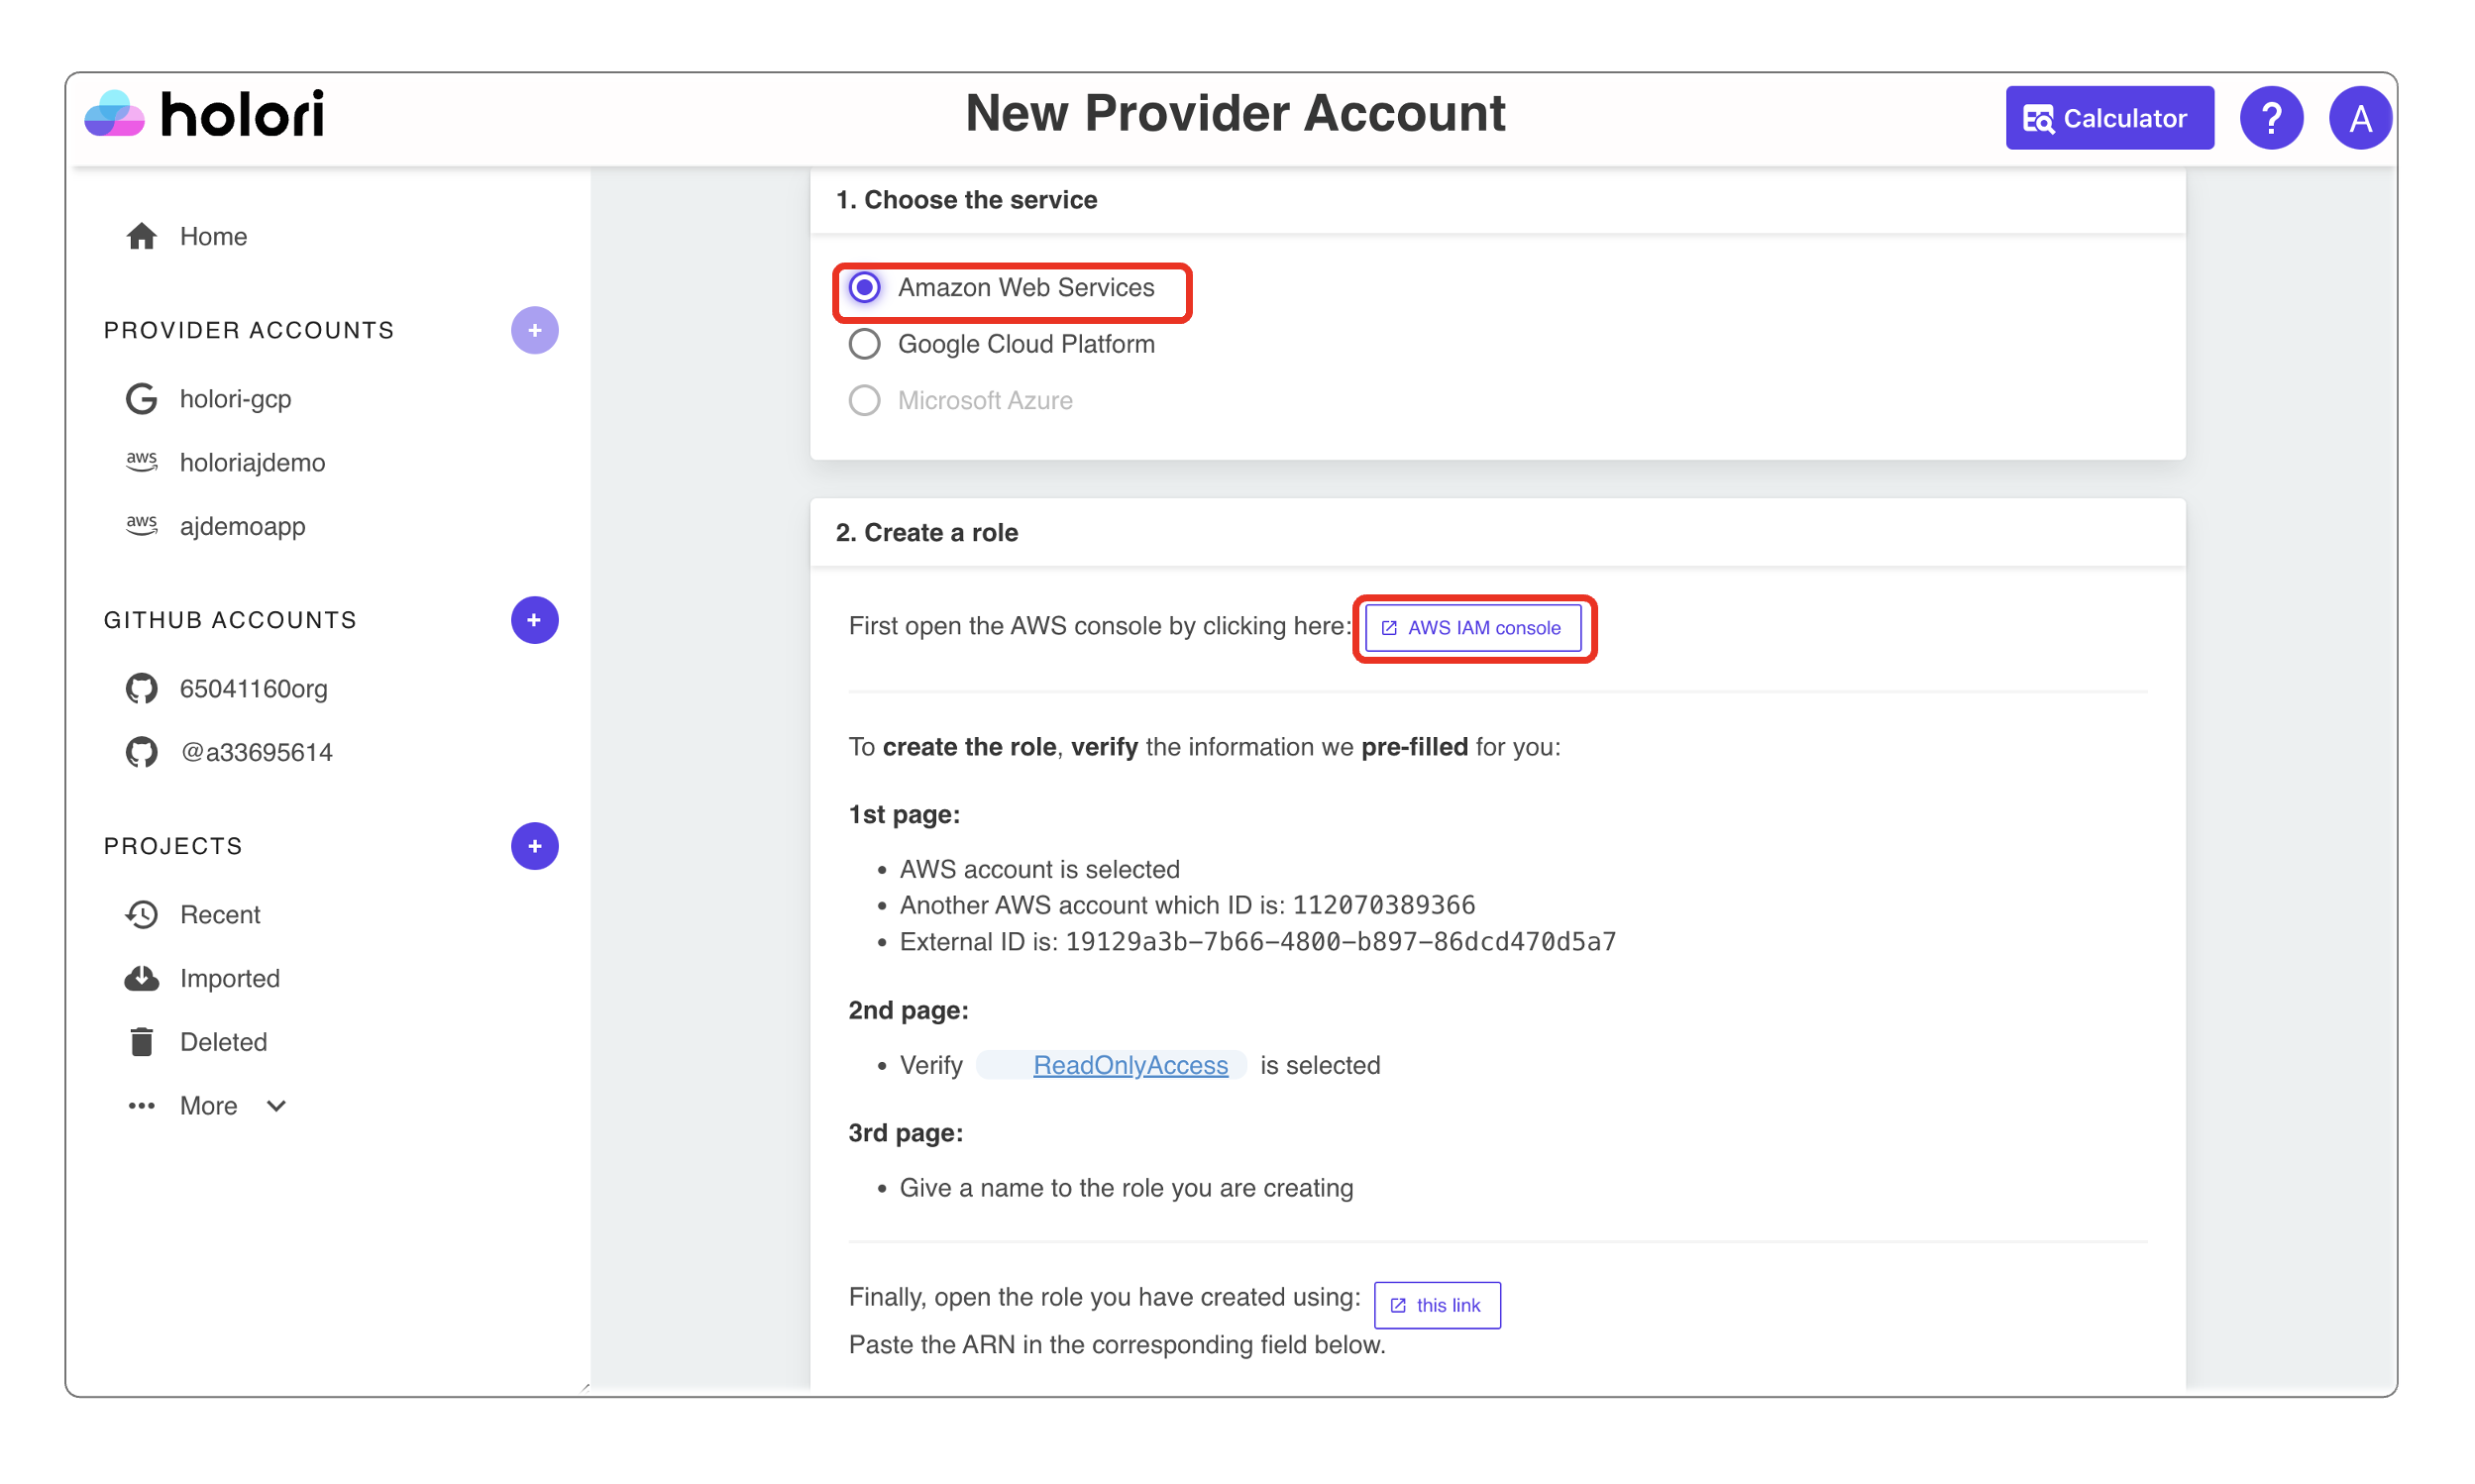
3- Below, click on the "AWS IAM Console" link. A new tab will open redirecting you to the AWS console login page (or the role creation page directly if you are already logged in).
Alternatively, use this link: https://console.aws.amazon.com/iamv2/home#/roles/create?awsAccount=112070389366&externalId=f97fd11c-3fcc-4c28-bcf4-b327179915c2&policies=arn%3Aaws%3Aiam%3A%3Aaws%3Apolicy%2FReadOnlyAccess&isThirdParty=true&step=review&trustedEntityType=AWS_ACCOUNT
4- You will be redirected to the “create role page”on AWS. Holori will have already pre-filled information. All you need to do is to double check the fields.
The information are the following :
Trusted entity type : AWS Account
Account ID : 112070389366
Checkbox for Require external ID: checked
A unique external ID is auto generated and filled and should match the one from the Holori app
Checkbox for MFA option: unchecked
The information follows AWS best practices and security recommendations.
5 - Click next,
Step 2: Verify the new policy
1- On the second page make sure that: "ReadOnlyAccess" permission is selected
2- Click next,
Step 3: Name and Create role
On the third and last page :
1 - Give the name "holori" to this role
2 - In “Step 2 : Add permissions” you can check once again the permissions and it should be : “ReadOnlyAccess”.
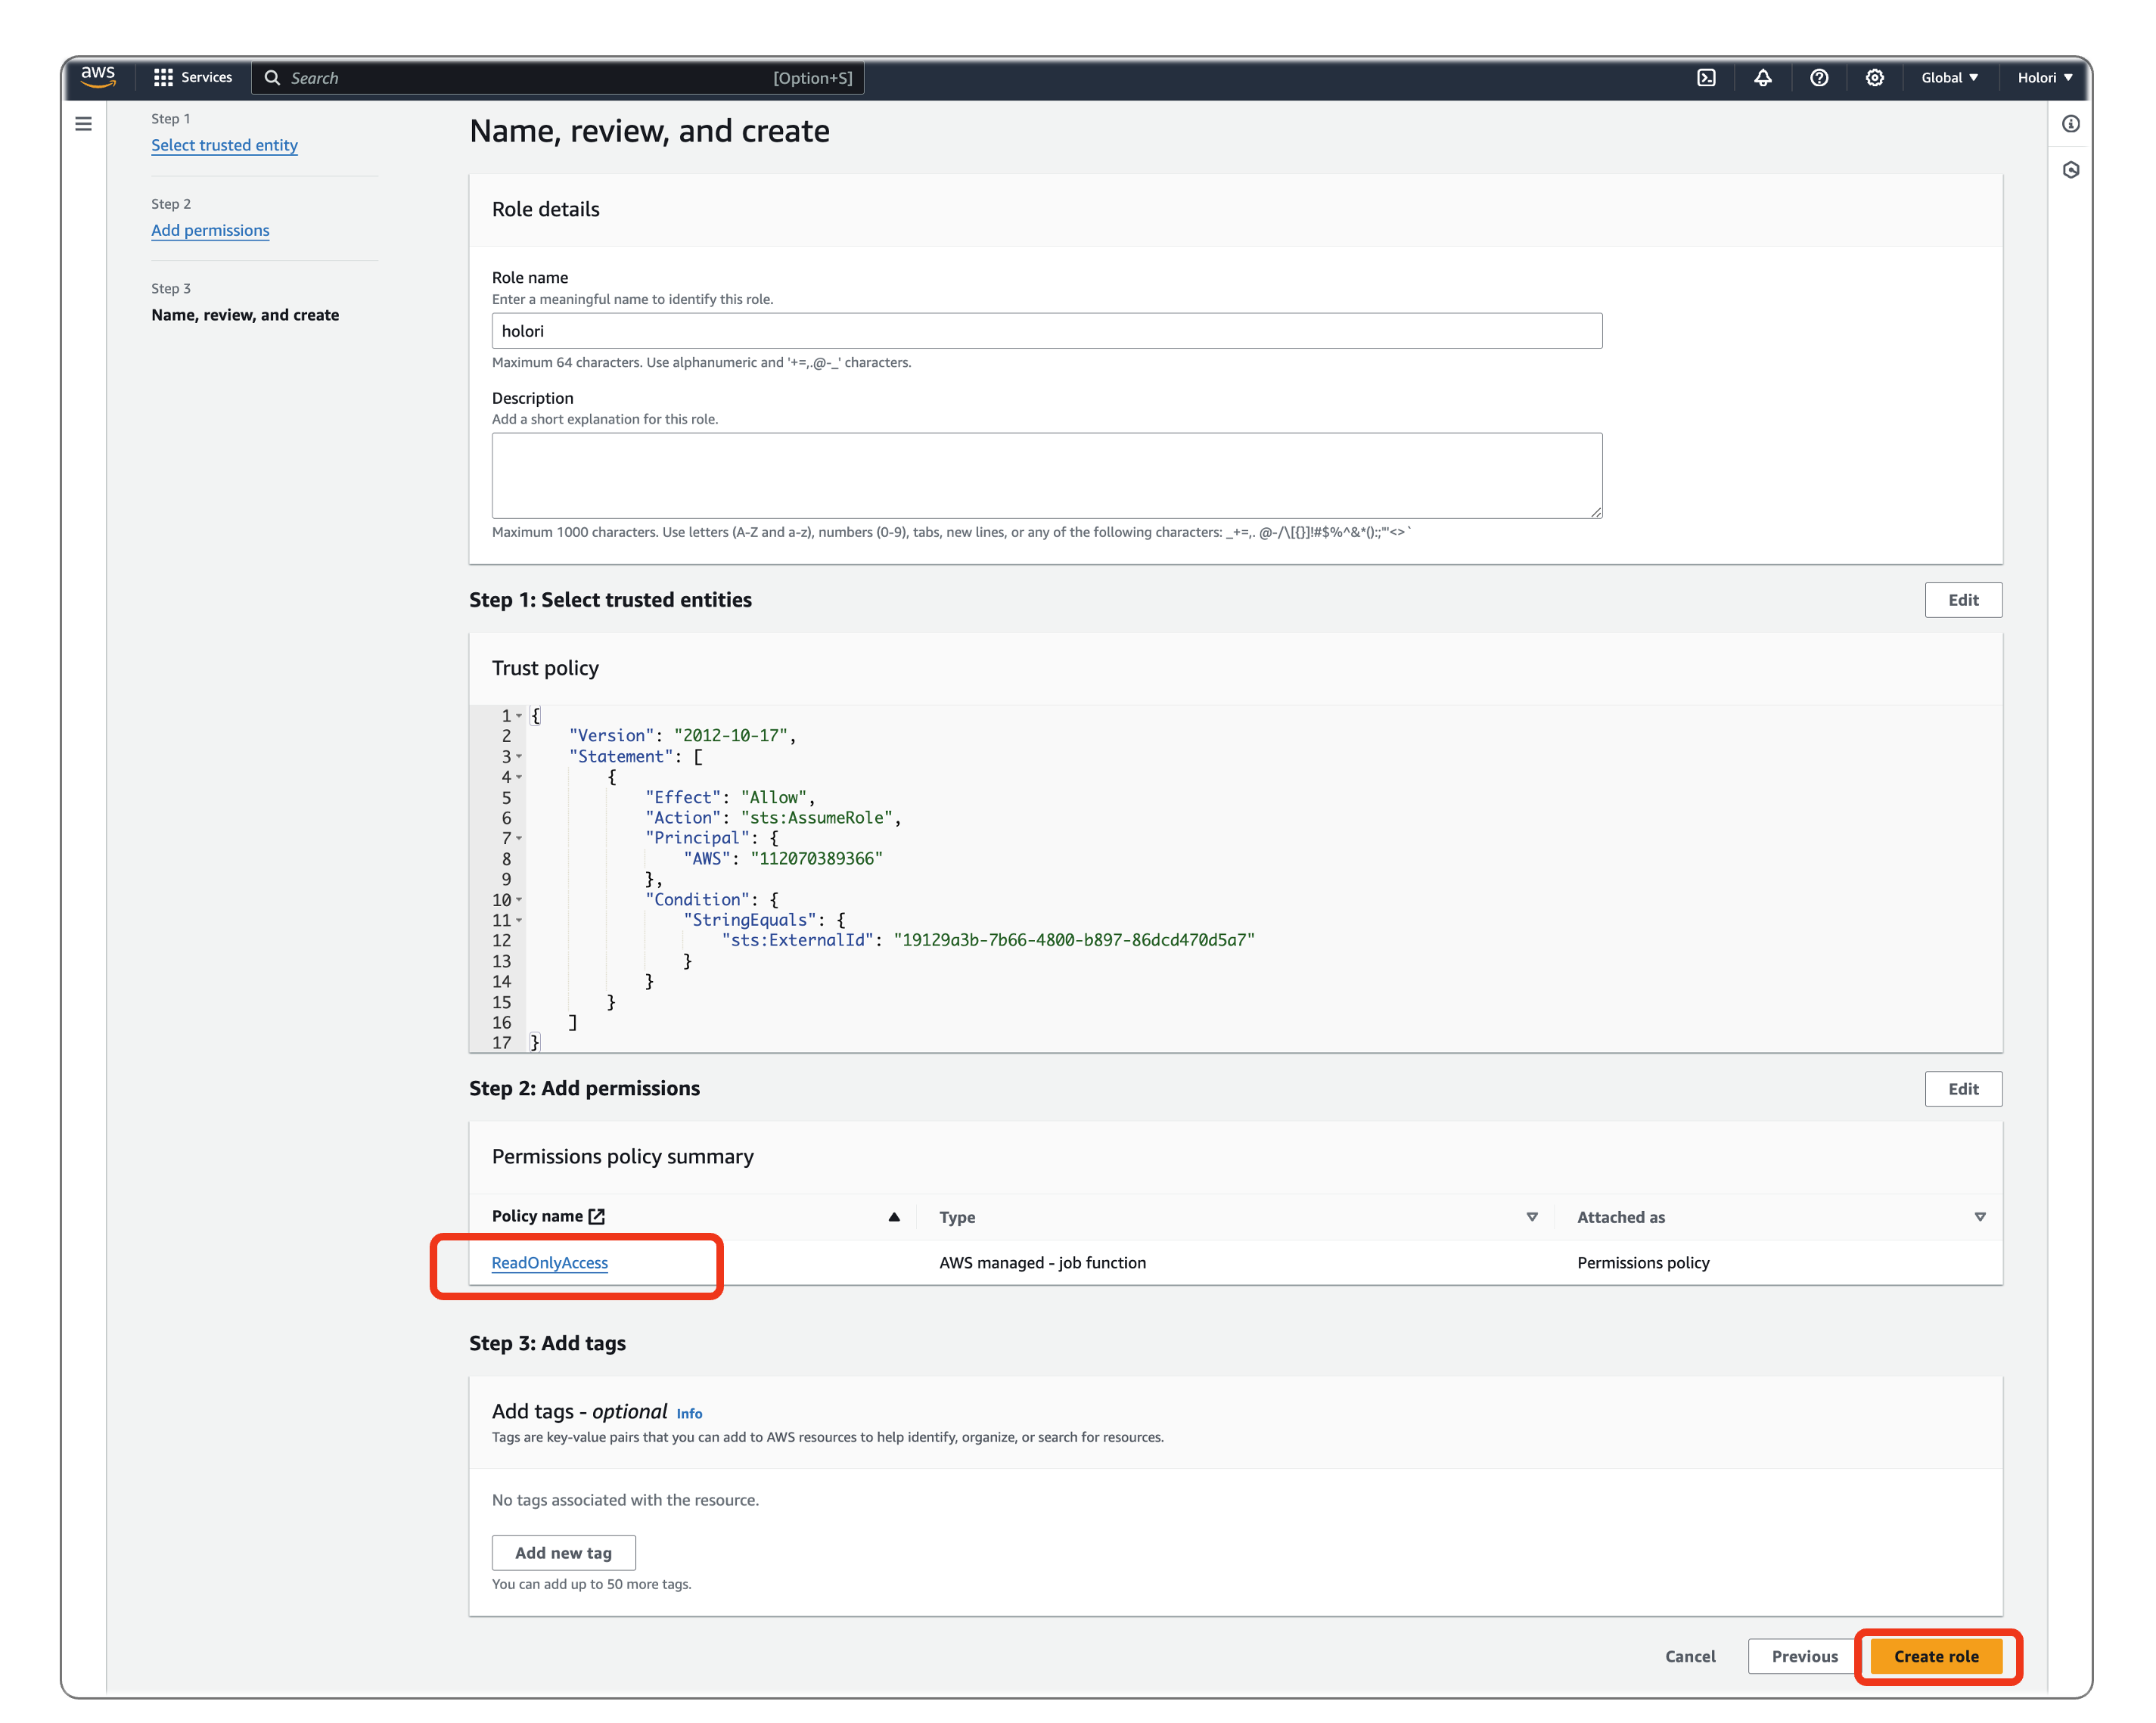
2- Now click on "Create role" at the bottom of the page.
Congratulations, your AWS role should now be created.
Step 4 : Add the cross account role to Holori app
1- Copy your ARN and come back to the Holori tab to paste it.
2- Write down your role name as well, if you followed the steps above it should be "holori".
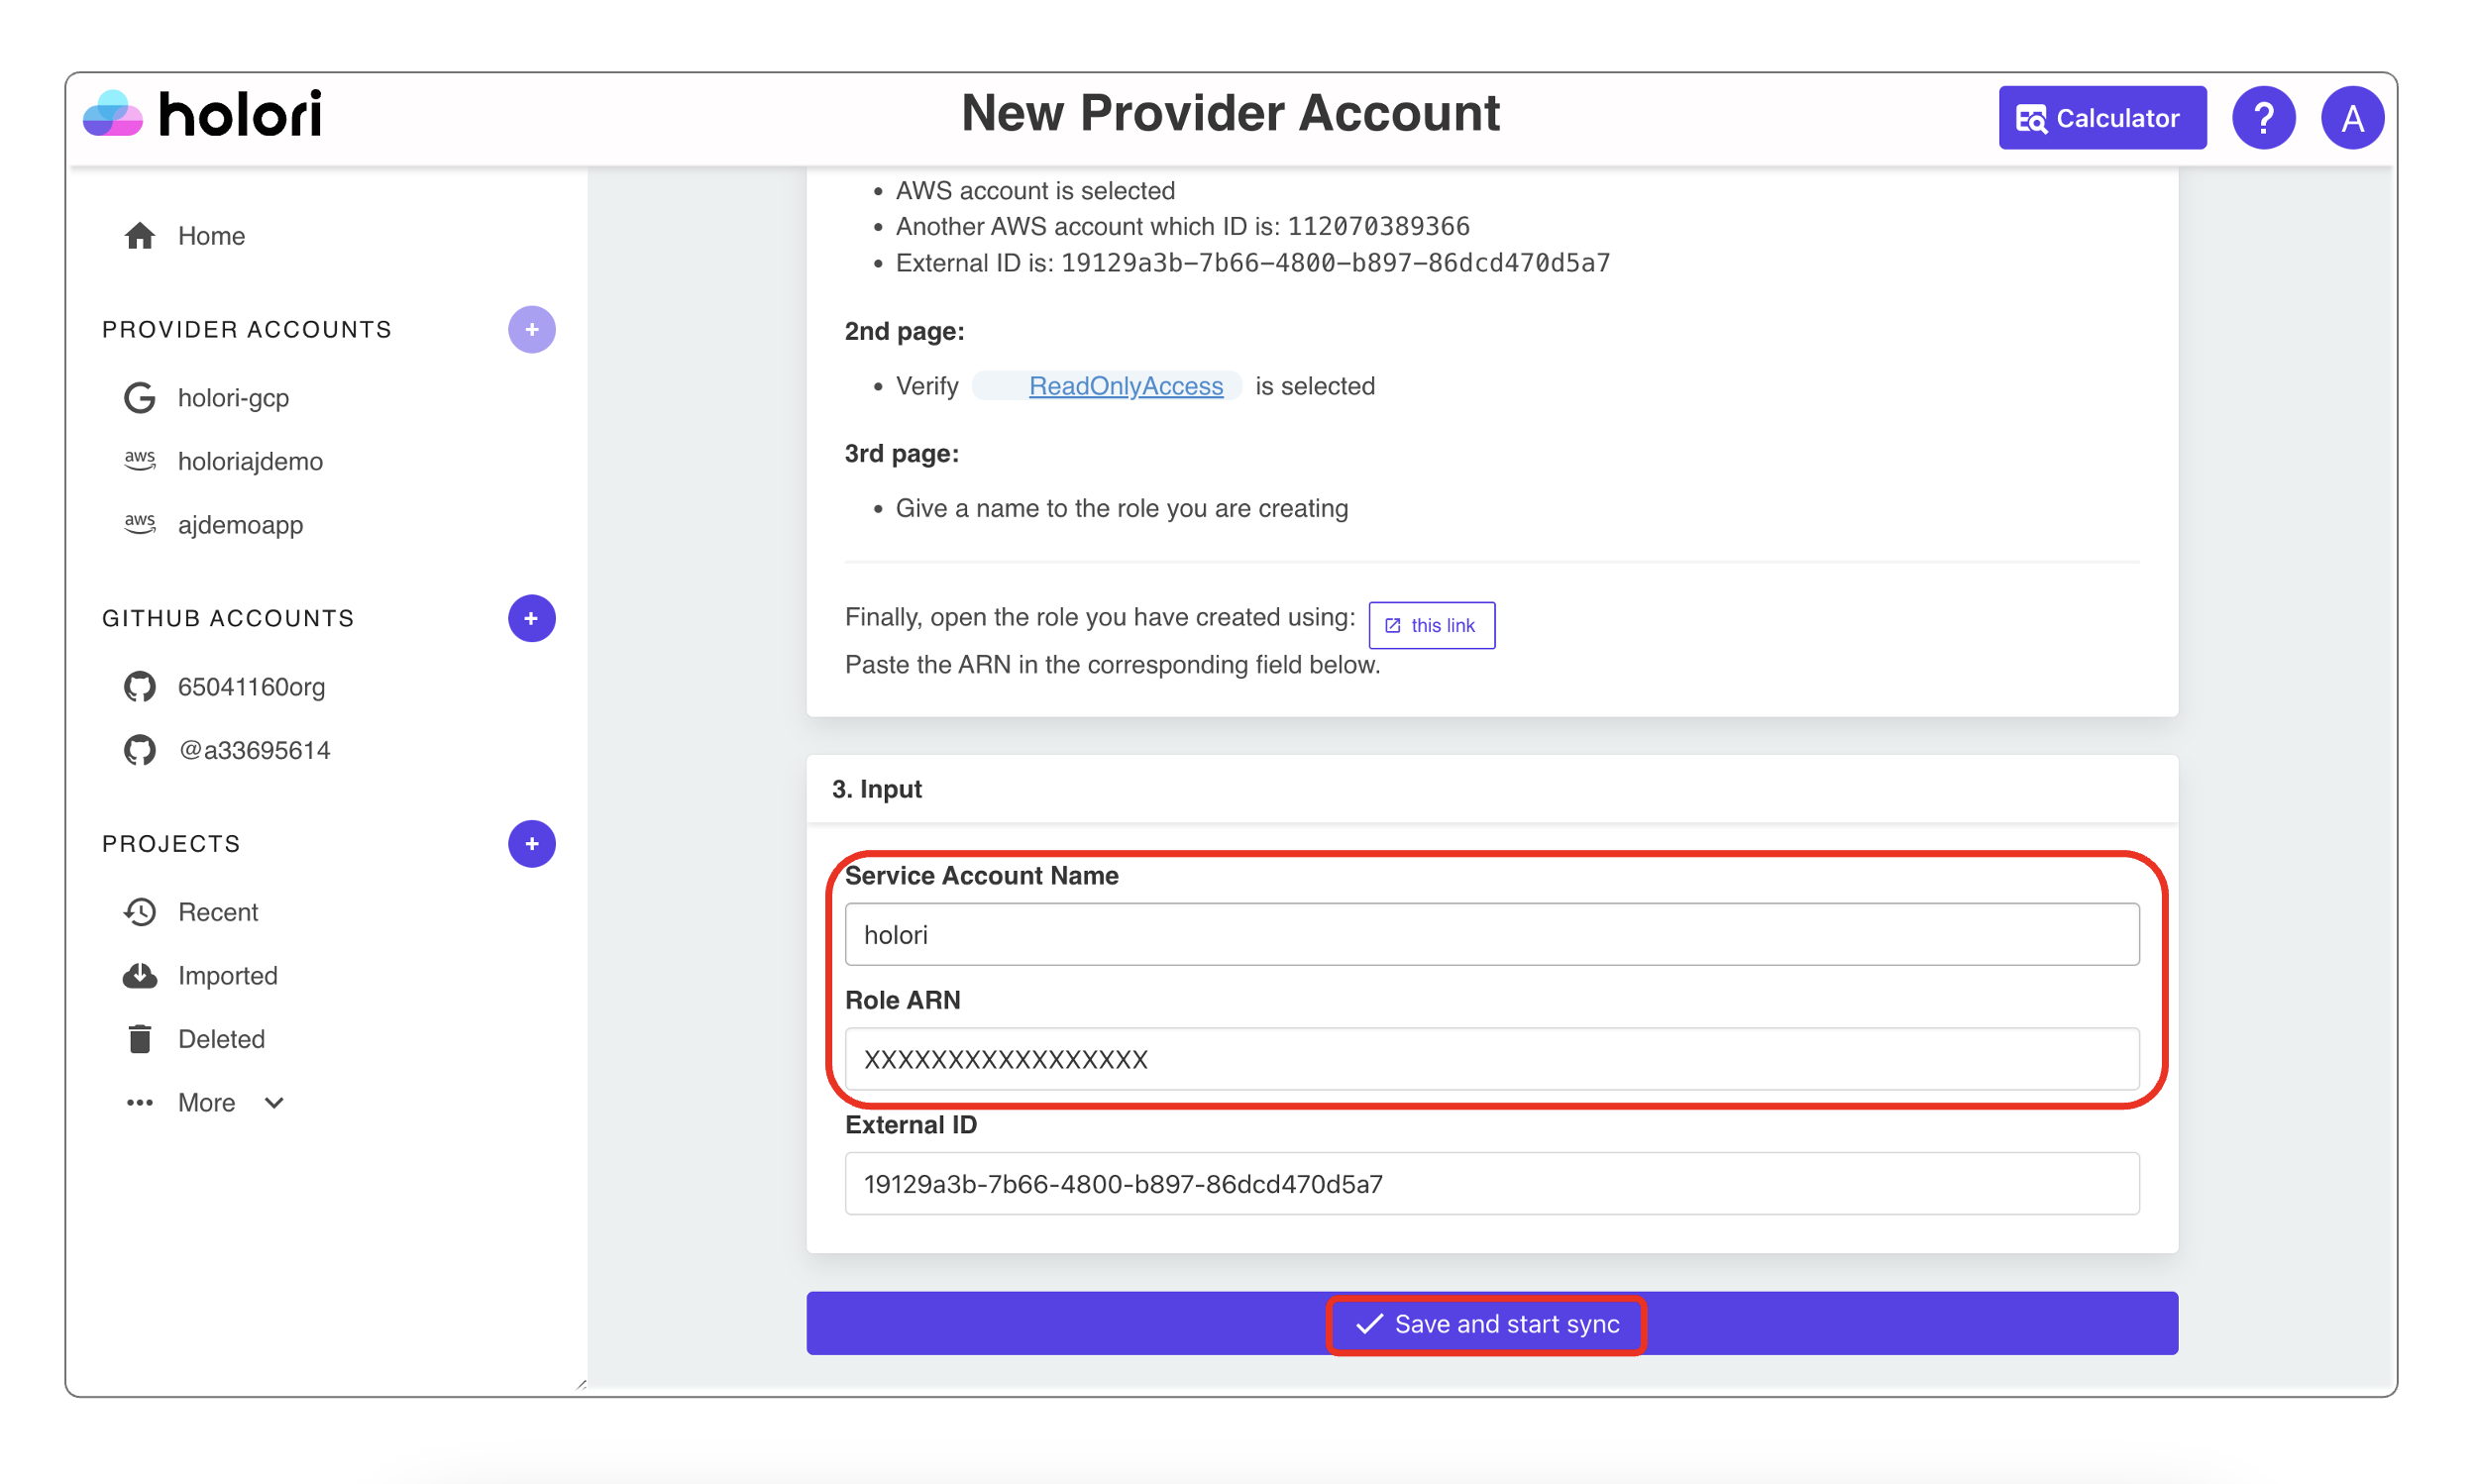
3- Click on "Save and Verify" to finalize.
Step 5 : Import your AWS infra
On the homepage, select "New Project" under "Recent Projects". Then select import from provider. Alternatively, click on the + sign next to "Projects" on the left bar.
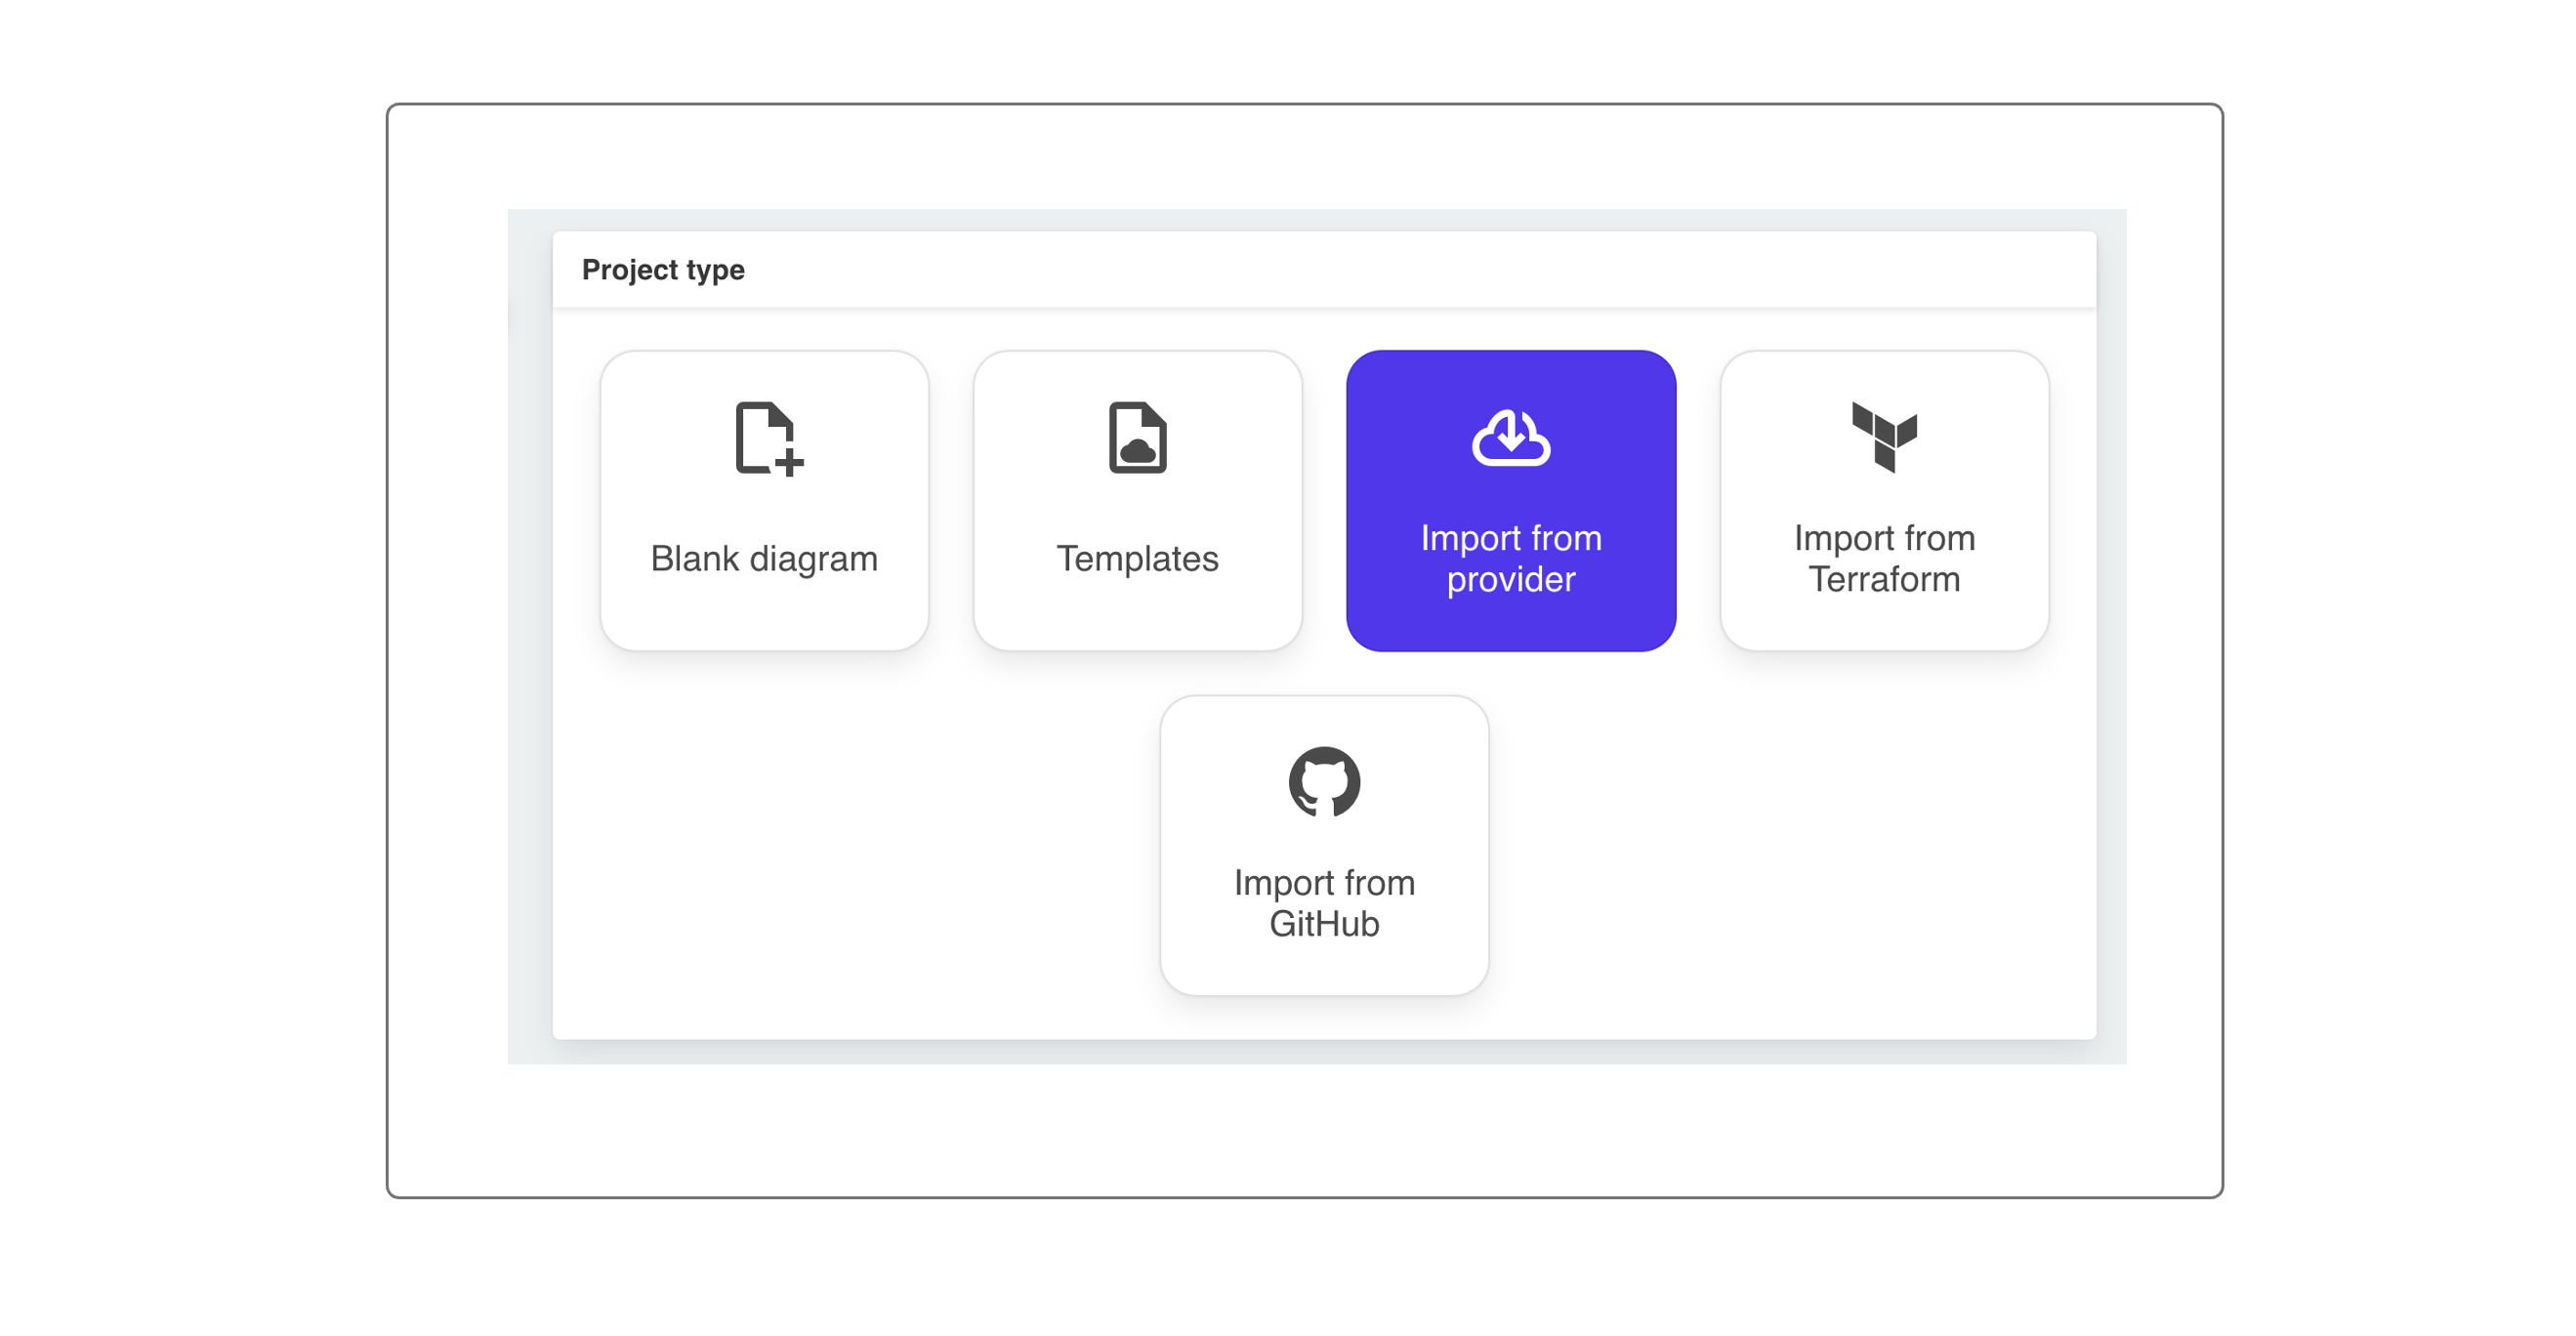
More options will appear.
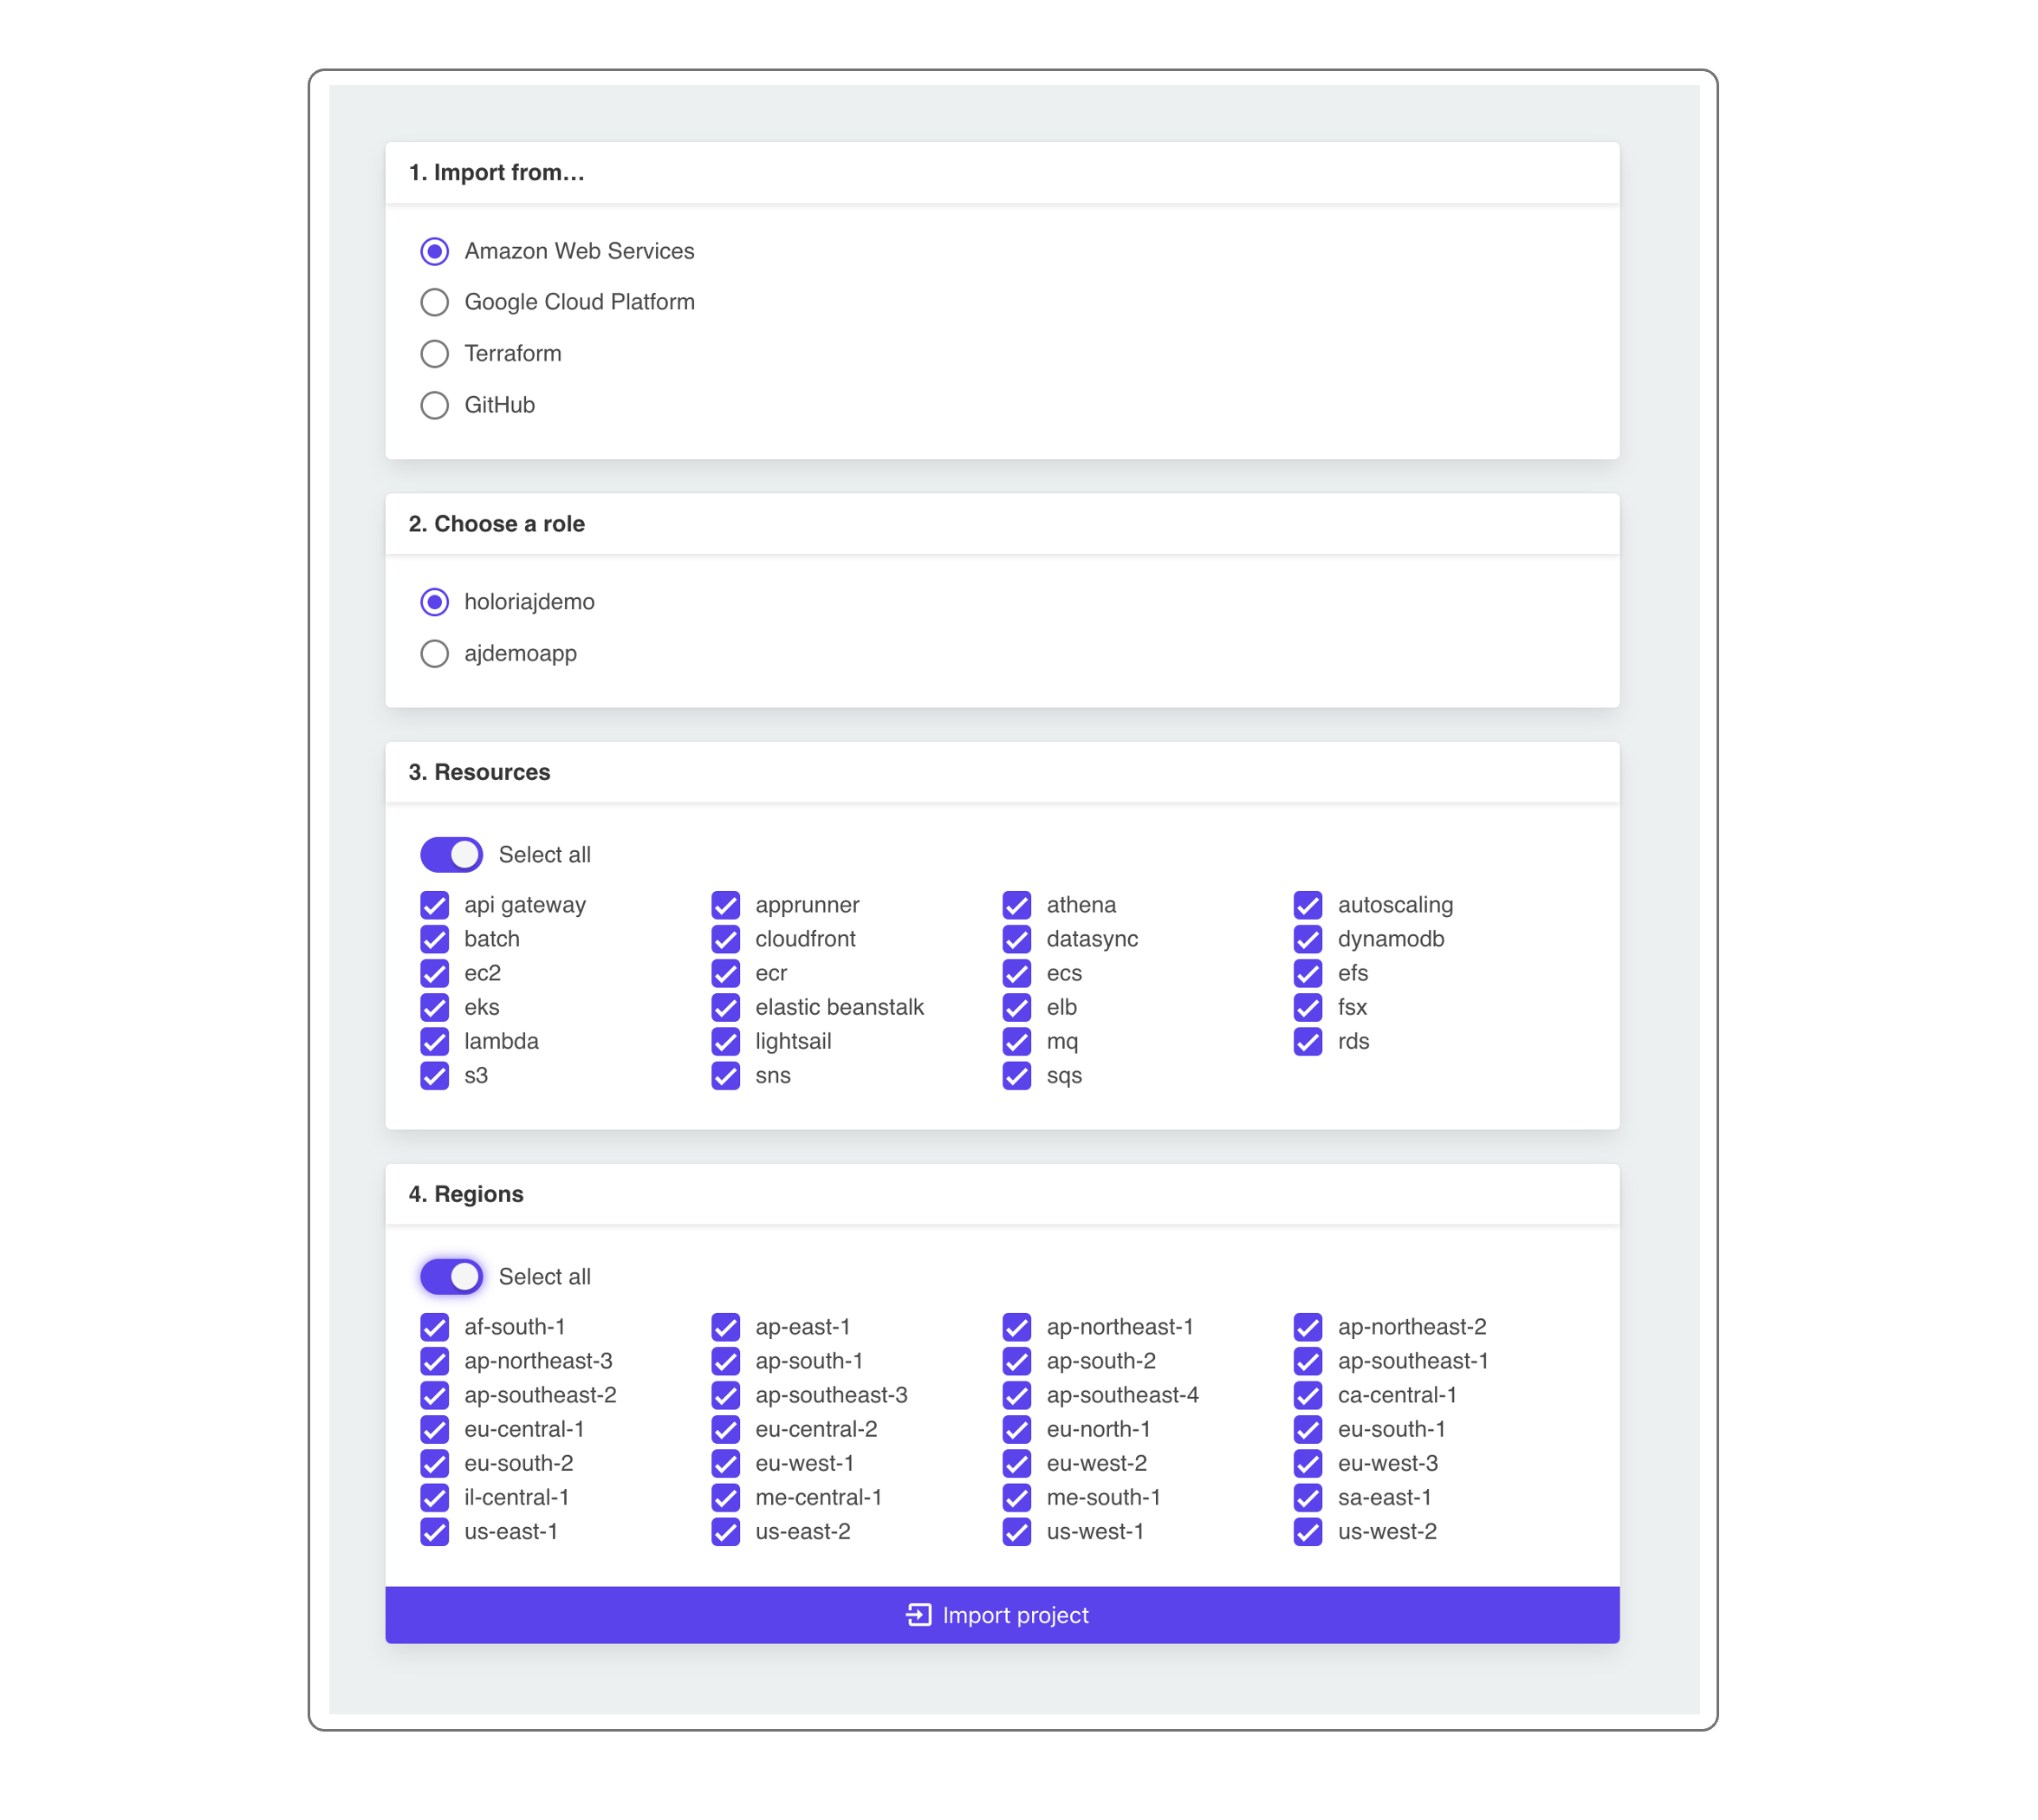
1- Select AWS
2- Select the role you previsously created, it should be "holori"
3- Select the resources you want to import
4- Select the regions you want to import
5- Select "import project" at the bottom and wait. Once the import is completed the created diagram opens automatically.
WARNING : Please note that the more resources and regions you select the longer the import duration will be. For a large infra it can last up to 20 minutes, go grab a coffee, and come back a bit later to enjoy your newly imported infra.